
Designing the Layout for My Horse Omikuji
Started laying out the horse omikuji today! Tested a few designs for printing and finalized the size based on the prototype box.
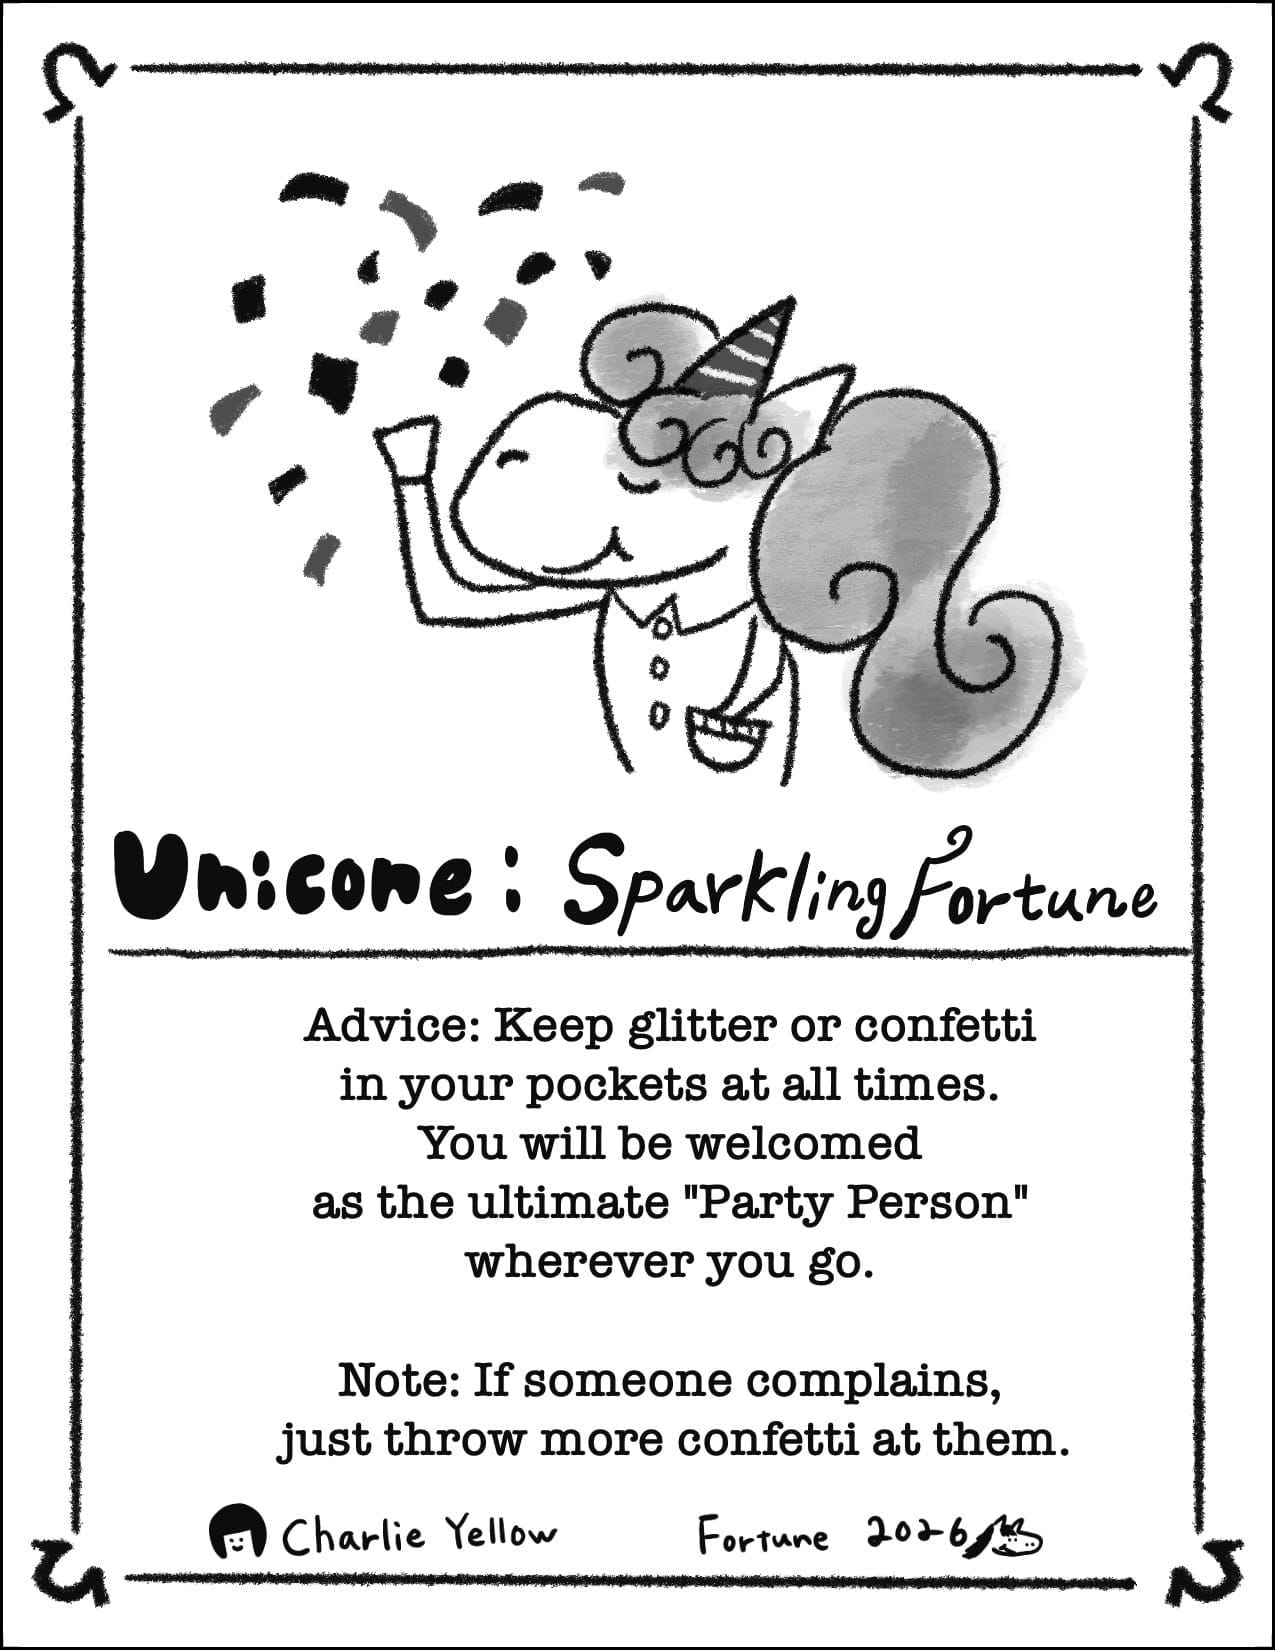
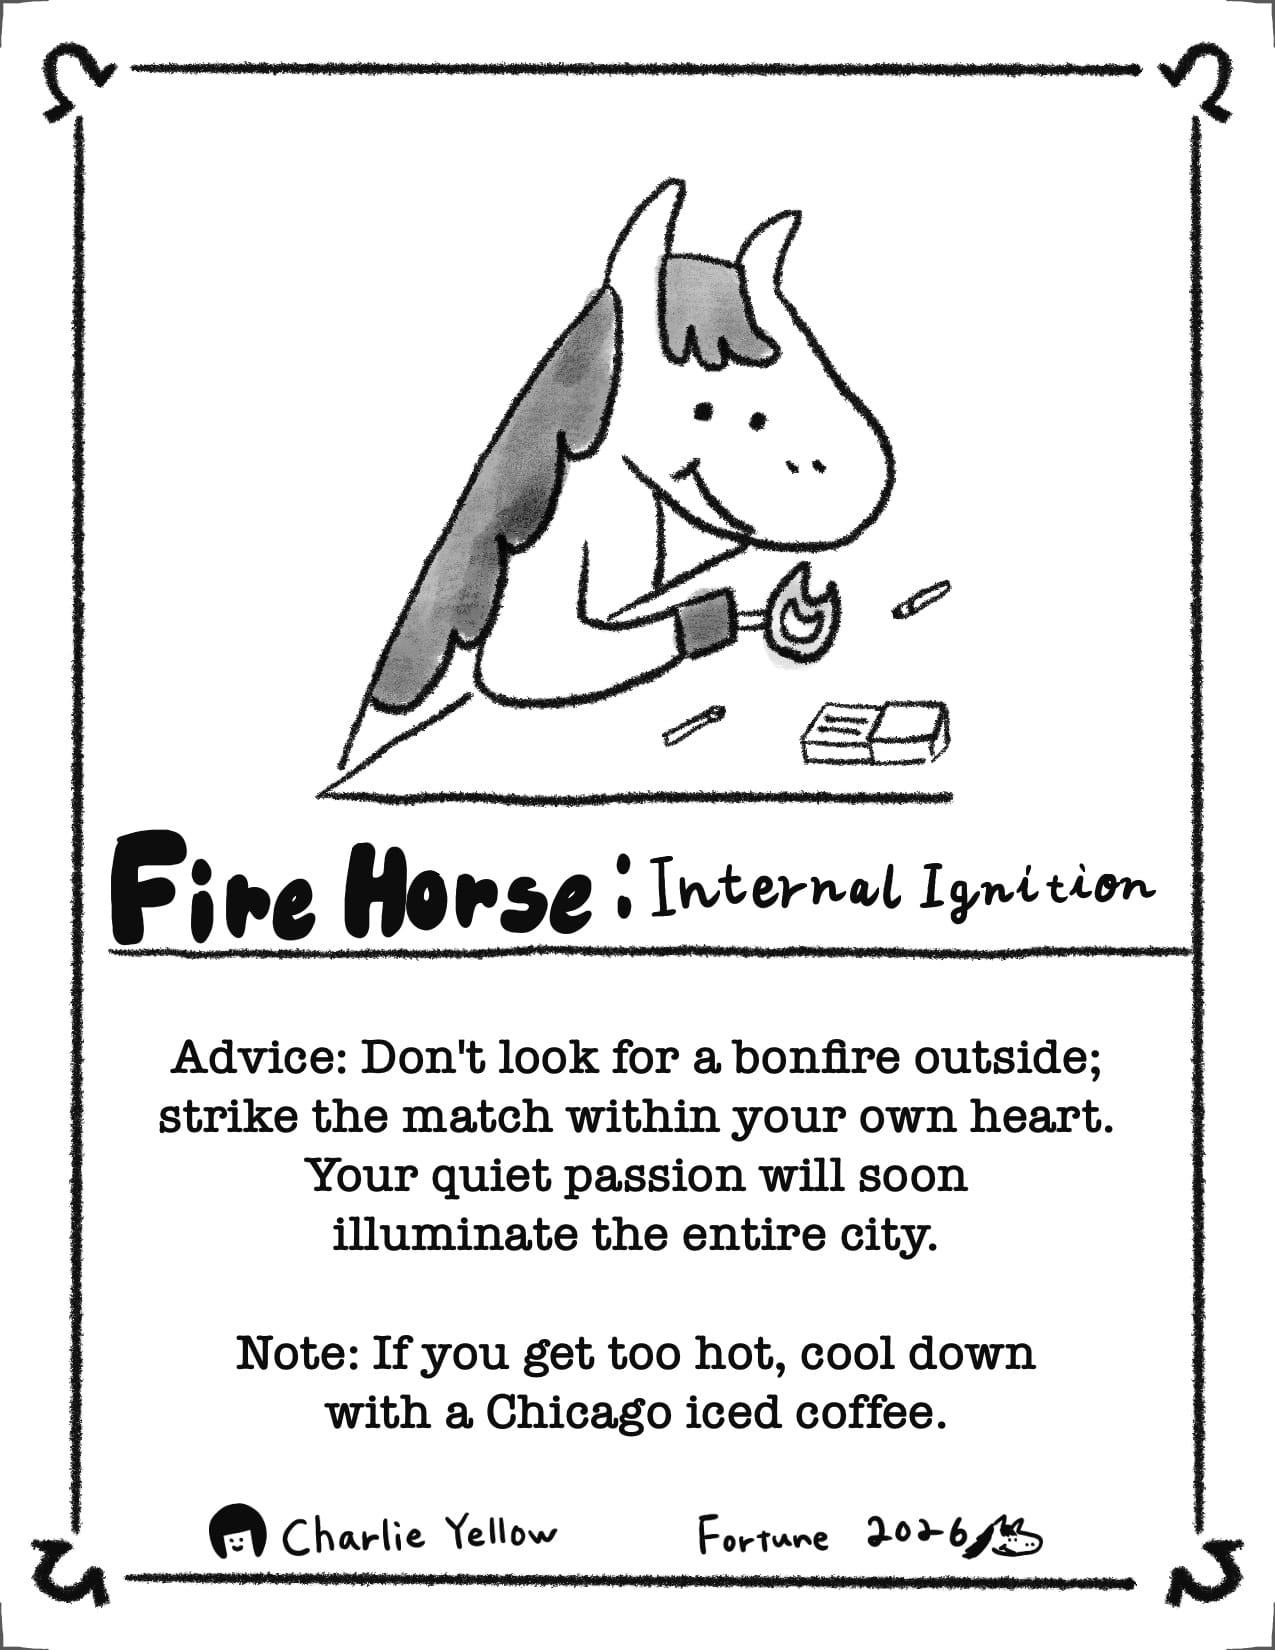
Today I focused on creating the layout for my horse omikuji! I already had the illustrations and text ready, so I turned to Pinterest for some design inspiration to make it feel more like a traditional omikuji.
Japanese omikuji are usually written vertically, so the paper is often long and narrow. But since mine is in English (and horizontal text), I thought a rectangular shape that’s not too long or narrow would work best.
Taking into account the shape and size of the prototype box I made yesterday, I finalized the dimensions. I figured if the paper is slightly wider than the diameter of the box’s opening, then when I roll up each omikuji into a stick shape, it’ll stay in place better. I also wanted to make cutting the paper simple, so I chose a size that lets me divide a tabloid sheet evenly into 8 parts.
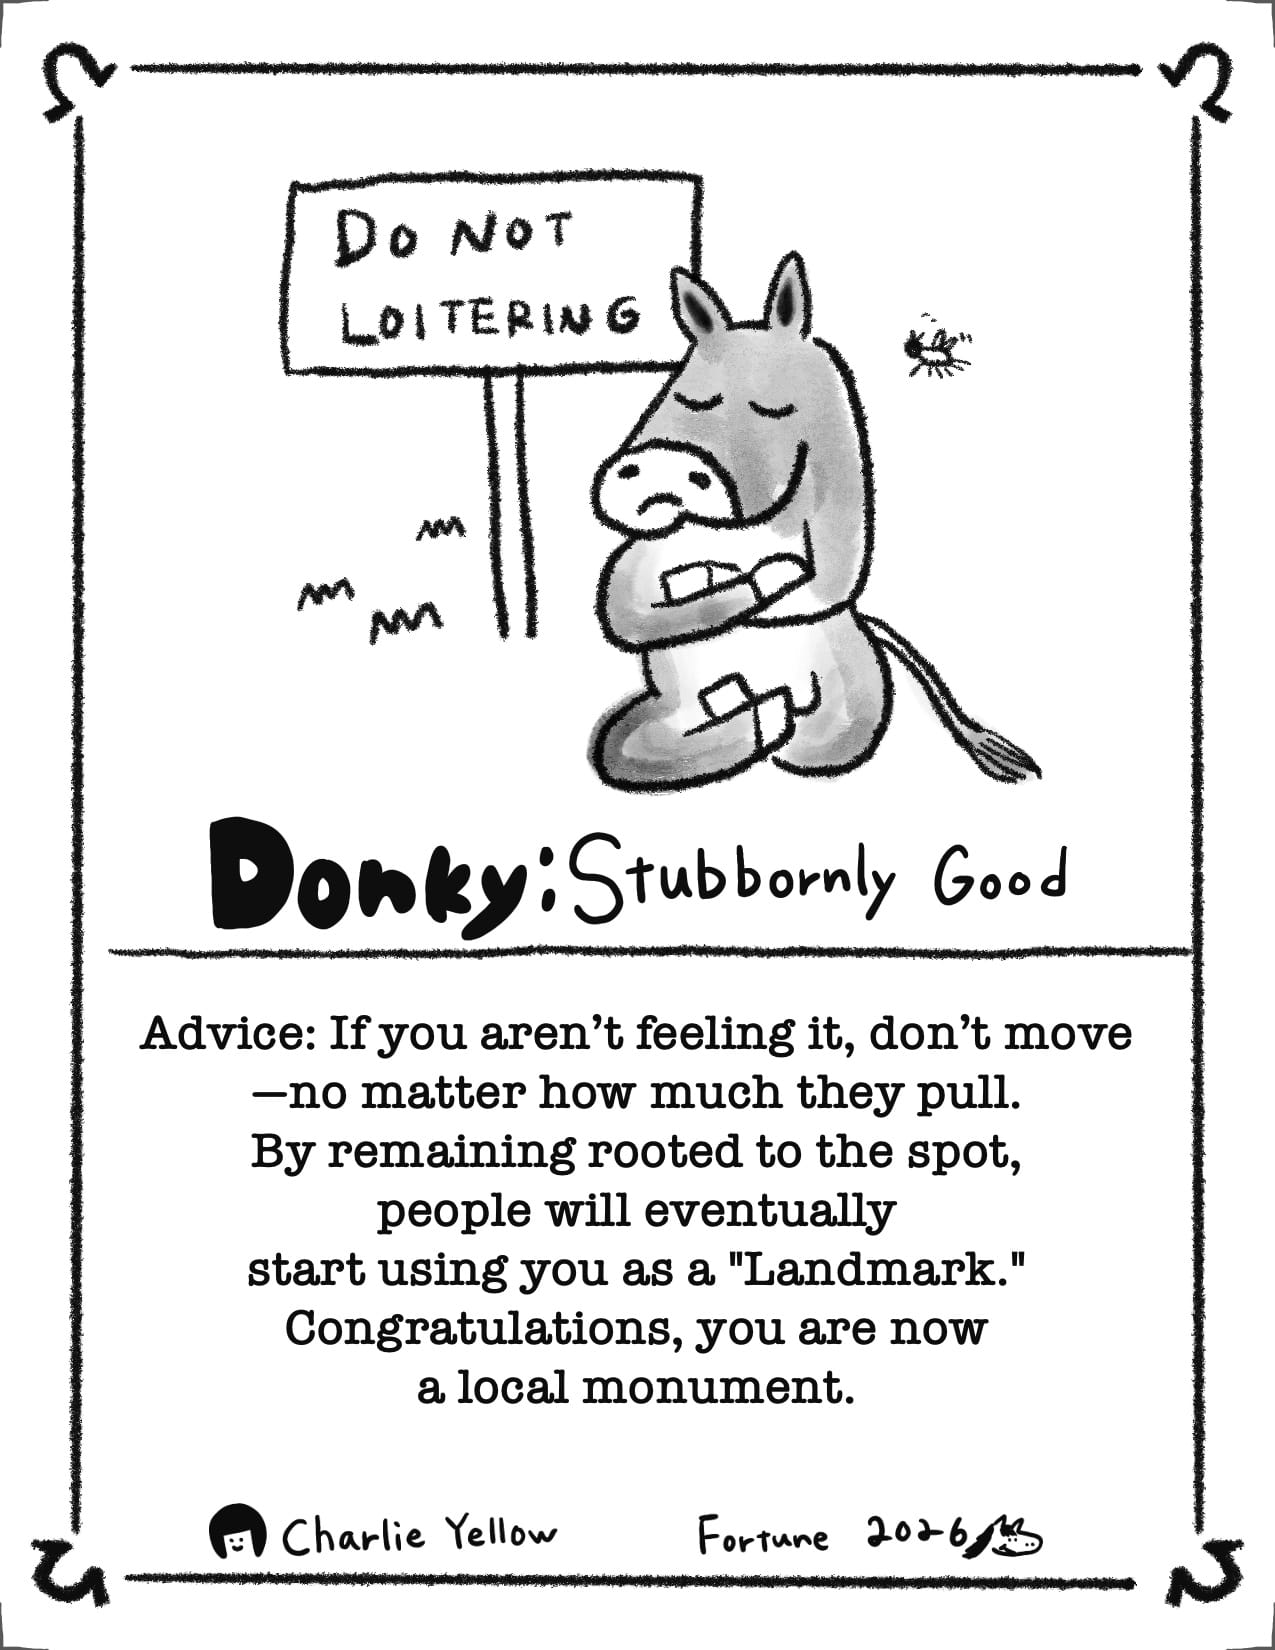
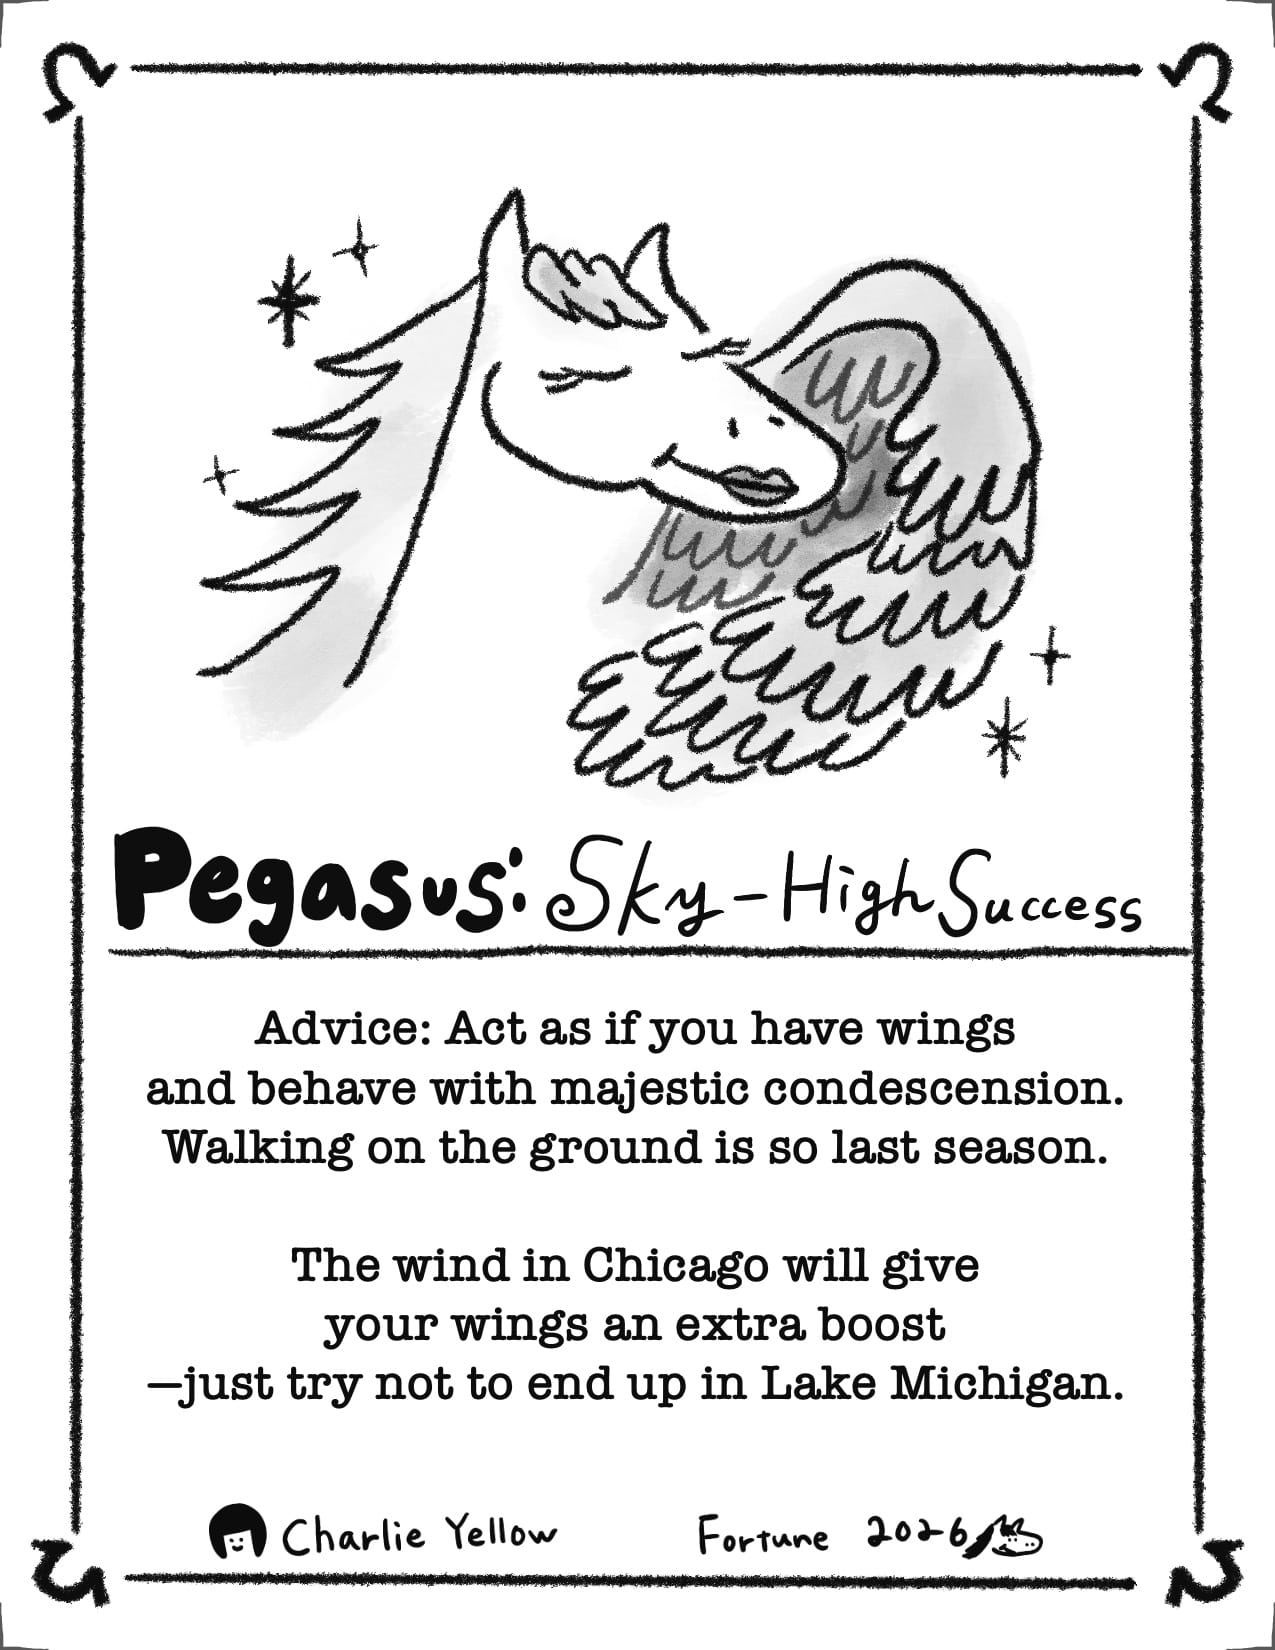
For now, I’m starting with an inkjet printer, so I made a file with just four designs to test print on 8.5x11 paper. I think the design is looking pretty good so far!