
Goodbye Suffering, Hello Photoshop Hack
Tried exporting Riso layers from Procreate to Photoshop for the first time—and the grayscale trick I learned? LIFE-CHANGING.

Today I exported my Riso layers from Procreate as Photoshop data for the first time ever—and then turned them into grayscale layers inside Photoshop.
It was really easy. I felt like, “Why did I make it so difficult until now?”
I watched a tutorial on YouTube and tried it right away. The process was super simple and smooth—I was really surprised!
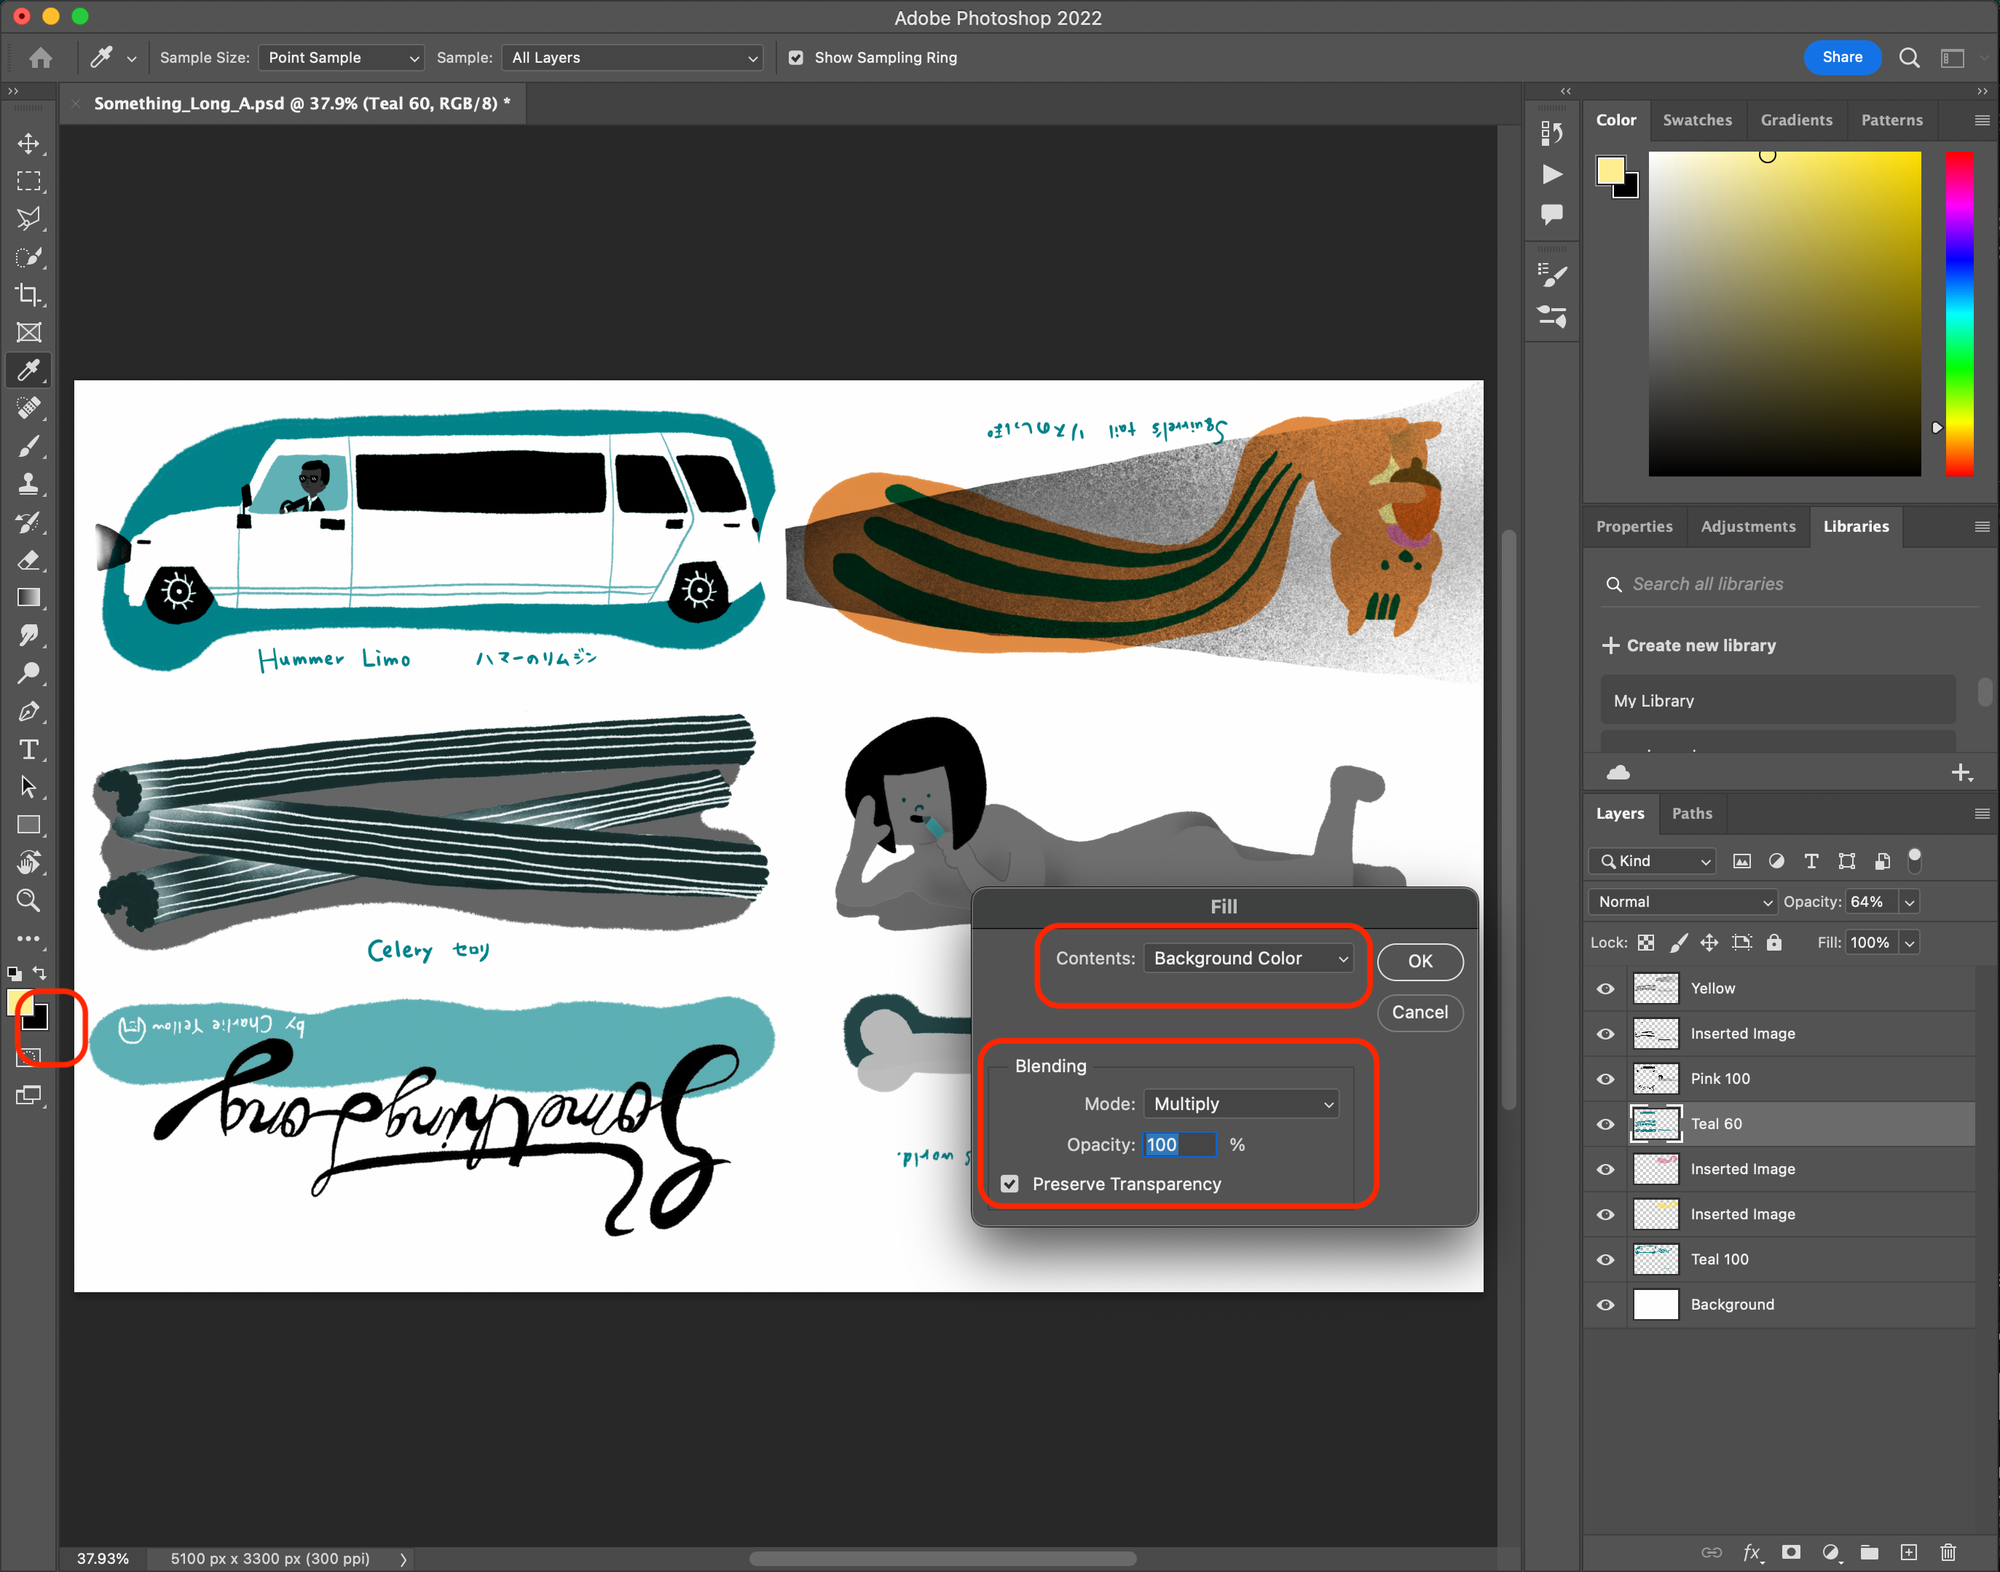
In the Layers Panel, I chose the layer I wanted to convert. Then on the left toolbar, I set the background color to 100% black. After that, I pressed Shift + Ctrl + Delete to open the Fill box.
In the Fill box, I chose “Background Color” for the contents, set the blending mode to “Multiply”, checked “Preserve Transparency”, and pressed OK.
Just like that, the layer turned grayscale in one go! I couldn’t believe it! It saved so much time. I definitely want to use this way again!